Lexicon Plugins
Write your own plugins and share them with other Lexicon members
Lexicon lets you write plugins in Javascript with access to everything the Local API has to offer. You can run these plugins from inside the Lexicon GUI.
Please join Discord in the #developers channel to get help.
What is a plugin?
A plugin is a package with a config file that defines actions. The plugin actions are what the user runs. Each action has it's own set of permissions, settings and storage.
Plugins are loaded automatically when they are detected in the Documents/Lexicon/Plugins folder.
Everything a plugin does uses the Local API internally, so whatever you can do with the API you can also do with a plugin. A plugin just provides a GUI inside Lexicon and is more user friendly.
Plugin structure
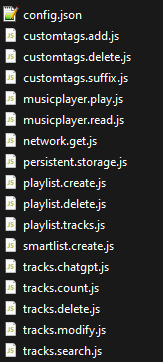
A plugin is a ZIP file that contains:
- A
config.jsonfile with list of actions and permissions - At least one Javascript action file
Configuration file
The config.json file defines all available actions and the permissions and settings for each action. It can look something like this (larger example in the example plugin):
{
  "id": "rekordcloud.example",
  "author": {
    "name": "Christiaan",
    "discordUsername": "Christiaan"
  },
  "actions": [
    {
      "id": "musicplayer.play",
      "name": "Play And Add Cues",
      "description": "This action will play the first selected track and add a cue every 4 beats after the first beatgrid marker.",
      "config": {
        "permissions": {
          "track": {
            "read": [
              "selected"
            ]
          },
          "control": true,
          "silent": false
        }
      }
    }
  ]
}
The following top level plugin properties are available:
{
  id: String // (required) Plugin identifier.
  author: { // (required) Author object.
    name: String // (required) Author (nick)name.
    discordUsername: String // (optional) Username on the Lexicon Discord.
    email: String // (optional) Contact email for Lexicon members. Discord username or email is required.
  }
  actions: Array[Action] // (required) Array of actions, see below.
}
Each action has the following properties:
{
  id: String // (required) Unique action ID and name of the Javascript file.
  name: String // (required) Action name visible to the user.
  description: String // (required) Action description.
  config: { // (required) Action configuration object.
    permissions: { // (required) Action permissions.
      track: { // (optional) Track permissions.
        read: Array[String]: Valid values: 'all', 'selected' // (optional) Read permissions. All tracks and/or selected tracks.
        modify: Array[String]: Valid values: 'all', 'selected' // (optional) Modify permissions. Must be either, cannot be both all & selected.
        modifyFields: Array[String]: Valid values see "Track Fields" schema in the Local API reference. // (required if track.modify) Fields that are going to be modified.
        create: Boolean // (optional) Create permission.
        delete: Boolean // (optional) Delete permission.
      }
      playlist: { // (optional) Playlist permissions
        read: Array[String]: Valid values: 'all', 'selected' // (optional) Read permissions. All playlists and/or selected playlists.
        modify: Array[String]: Valid values: 'all', 'selected' // (optional) Modify permissions. Must be either, cannot be both all & selected.
        modifyFields: Array[String]: Valid values: 'name', 'tracks', 'smartlist', 'parentId', 'position' // (optional) Fields that are going to be modified.
        create: Boolean // (optional) Create permission.
        delete: Boolean // (optional) Delete permission.
      }
      customTag: { // (optional) Custom Tag and Custom Tag category permissions.
        read: Array[String]: Valid values: 'all' // (optional) Read permissions.
        modify: Array[String]: Valid values: 'all' // (optional) Modify permissions. All fields can be modified. For available fields, see the Custom Tag schema in the Local API reference.
        create: Boolean // (optional) Create permission.
        delete: Boolean // (optional) Delete permission.
      }
      network: { // (optional) Network permissions
        GET: Array[String] // (optional) Array of whitelisted domains that the plugin can send a GET request to. For example: ['lexicondj.com']
        POST: Array[String] // (optiona) Same but for POST requests.
      }
      control: Boolean // (optional) Permission for the Control function. The control function has the same actions as the /control endpoint in the Local API, see API reference.
      silent: Boolean // (optional) If true, plugin will not show a notification when succesfully finished.
      storage: Boolean // (optional) Permission for this plugin action to store data in the Lexicon database, in its own database records.
      files: {
        write: Boolean // (optional) Permission for this plugin action to write to the Files folder.
        list: Boolean // (optional) Permission for this plugin action to list the Files folder.
        read: Boolean // (optional) Permission for this plugin action to read the Files folder.
      }
    }
    settings: Object // (optional) Object with user settings that can be changed in the GUI. Set a value for a default setting. Example: { "Suffix": "Vocals" }
    allowParallel: Boolean // (optional) Allows this action to be run multiple times simultaneously.
    exclusive: Boolean // (optional) Enables a full screen loader and disables the Lexicon GUI. Use this for slow plugins that may break things when doing other work at the same time.
    confirmationMessage: String // (optional) If set, shows a warning message with confirmation before running this action.
    silent: Boolean // (optional) If true, does not show a completion popup
  }
}
Example plugin
There is an offical example plugin that shows how to use most features of the plugin system. Highly recommend to look through it.
You can find the example plugin on Github.
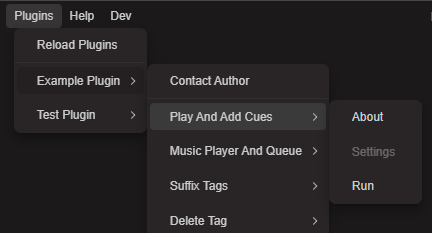
Download the example plugin as ZIP file and put the ZIP file in the Documents/Lexicon/Plugins folder. Restart Lexicon and the Plugins menu will appear at the top.
If you want to edit and run the extracted plugin without ZIP file, read the Development chapter below.
Development
To make plugin development quicker and easier, there are a few development options. To use these, create the following JSON file: Documents/Lexicon/Plugins/development.json
This file has the following available properties:
{
  reloadBeforeRun: Boolean // (optional) Reloads the action javascript before running it.
  loadPluginFolders: Boolean // (optional) Loads plugins from folders, not just ZIP files. The folder must have the same contents as a plugin ZIP file.
}
A good starting point is to enable loadPluginFolders and clone the example plugin repo from Github into the Documents/Lexicon/Plugins folder.
Another tip to speed up development is to set a hotkey for your plugin action.
Distribution
To distribute a plugin, make a ZIP file of your script file(s) and config.json file. This ZIP file can be loaded by any Lexicon when it is put in the Documents/Lexicon/Plugins folder. A Lexicon restart is required the first time a plugin is added here.
For even easier distribution, you can link to the "Download ZIP" button on your Github repo for the plugin. This will simply ZIP the entire master branch and Lexicon will be able to read it.
If you want to share your plugin with other Lexicon members, please post it on our forum and don't hesitate to share or ask feedback on Discord #developers. ❤️
Caveats & limitations
The plugin Javascript is run in a protected environment so access to sensitive/dangerous functions is not possible. That means you can't use require() or import nor use the window or document object.
You should be able to use normal Javascript but because the script has a preprocessing stage with some limitations, there are a few things to keep in mind:
Don't use if-statement oneliners, but use curly brackets instead
❌ if (condition) throw new Error('Oops!')
✅ if (condition) {
  throw new Error('Oops!')
}
Don't use a do-while loop
❌ do {
  // Code
} while (condition)
Trailing semicolons after loops or brackets may in an "unexpected token" error
❌ if (condition) {
  // Code
}; // <-- Remove this one
❌ for (let i = 0; i < 10; i++) {
  // Code
}; // <-- Remove this one
Explicitly set keys for your objects
❌ const index = 0
const obj = { index }
✅ const index = 0
const obj = { index: index }
Create / Read / Update / Delete tracks
Creating tracks
Adding new tracks to the Lexicon library can be done with the _library.track.create(locations: string[]) function.
Reading tracks
Reading tracks from the Lexicon library can be done in two ways:
- Selected tracks (a user has selected tracks in the track browser). The "selected" permission is required in the
config.permissions.track.readarray. - All (non-archived) tracks. The "all" permission is required in the
config.permissions.track.readarray.
Selected tracks are available as array on the global variable _vars.tracksSelected. This is an array of all selected tracks that you can simply loop over.
All tracks is more complex because it's not possible to hold all tracks in memory, as some users may have up to a million tracks. To go through all tracks, you must call a function to get a next batch of tracks: await _library.track.getNextAllBatch(). Keep calling this function until the resulting array is of length 0. Then you've gone through all tracks. Keep in mind this does not include archived tracks. They are outside of the plugin scope. The total amount of (non-archived) tracks can be found in _vars.tracksAllAmount.
Without permission, the global variable and batch function will be null.
Updating tracks
You can update any track object obtained from _vars.tracksSelected or _library.track.getNextAllBatch(). Just updating a field will track the modification. A field does need to be whitelisted to modify in the config.permissions.track.modifyFields array. If the field is missing, it will silently skip field.
All available fields and their types can be found in the Local API reference, see Schemas at the bottom.
You need the config.permissions.track.modify permission and whitelist the right fields in the config.permissions.track.modifyFields property.
Deleting tracks
You can delete tracks by calling the _library.track.delete with a track object as parameter. This will queue it for deletion when the plugin finishes.
Permission needs to be set in the config.permissions.track.delete property.
Create / Read / Update / Delete (CRUD) playlists
Reading playlists
Reading playlists from the Lexicon library can be done in two ways:
- Selected playlists (a user has selected playlists in the playlist panel). The "selected" permission is required in the
config.permissions.playlist.readarray. - All playlists. The "all" permission is required in the
config.permissions.playlist.readarray.
You can access playlists with the _vars.playlistsSelected and _vars.playlistsAll variables. Tracks inside playlists can be obtained with playlist.getTrackIds() (faster but only track IDs) or playlist.getTracks() (slower but full track objects).
Without permission, the _vars.playlistsSelected and _vars.playlistsAll variables will be null.
Creating playlists & smartlists
You can create a playlist by calling the _library.playlist.create. Parameters are the same as the POST /playlist endpoint and can be found in the Local API reference.
Updating playlists
You can update a playlist by changing properties of the playlist objects inside the _vars.playlistsSelected and _vars.playlistsAll arrays.
You need the config.permissions.playlist.modify permission and whitelist the right fields in the config.permissions.playlist.modifyFields property.
Deleting playlists
You can delete playlists by calling the _library.playlist.delete with a playlist object as parameter. This will queue it for deletion when the plugin finishes.
Permission needs to be set in the config.permissions.playlist.delete property.
Create / Read / Update / Delete (CRUD) Custom Tags & Custom Tag categories
Reading Custom Tags
Custom Tags and their categories are available in the _vars object:
_vars.customTags_vars.customTagsCategories
Without config.permissions.customTag.read permission set to "all", these variables will be null.
Creating Custom Tags
You can create a Custom Tags by calling the _library.customTag.create. Parameters are the same as the POST /tag endpoint and can be found in the Local API reference.
The same goes for creating a Custom Tag category with the _library.customTagCategory.create function with the POST /tag-category endpoint.
Permission needs to be set in the config.permissions.customTag.create property.
Updating Custom Tags
You can update Custom Tags and categories by changing properties of the Custom Tag objects inside the _vars.customTags and _vars.customTagCategories arrays.
You need the config.permissions.customTag.modify permission.
Deleting Custom Tags
You can delete Custom Tags and categories by calling the _library.customTag.delete with a Custom Tag object as parameter. This will queue it for deletion when the plugin finishes. The same goes for the _library.customTagCategory.delete function for Custom Tag categories.
Permission needs to be set in the config.permissions.customTag.delete property.
Settings & storage
Plugin support two kinds of ways to store items, settings and storage. Both is saved to the Lexicon database in a special record for the plugin action. Actions only have access to their own settings and storage.
Settings (for users)
Settings are intended for users to change. A plugin can only define the settings in the config.settings object with an optional default value. A user can change the settings. Settings persist in the Lexicon database.
Settings are always stored as string so if your type is something else like a number or array, you need to parse it.
Storage (for developers)
Storage is for internal plugin use and cannot be seen or changed by users. You can store any value here including objects and they will load as such.
Store a value by using the _storage.save("key", value) function.
Load a value by using the _storage.load("key") function.
Network requests
Plugins support making GET and POST requests. You need to whitelist domains you are going to make requests to.
You can whitelist any domain with the config.permissions.network.GET and config.permissions.network.POST arrays. Simply add the domain like so: ["lexicondj.com"]
You can then make a request with the helper functions: await _network.GET(params) and await _network.POST(params).
Parameter is an object like this:
{
  url: String // (required)
  headers: Object // (optional) Object of headers
  data: Object // (optional) Object of data added to the body of the request
}
These calls ignore any CORS restrictions and return the response body.
👉 See example plugin: network.get.jsHelpers
There are a few helper functions in the _helpers global:
_helpers.Log('message'): Log a message to the plugin log files at Documents/Plugins/Logs.
_helpers.Report('message'): Add a message as a new line to the report that is shown to the user when the action finishes.
await _helpers.Wait(1000) Asynchronous function that will wait the given amount of milliseconds.
Music Player
You can use the _musicplayer global to access functions that indicate what the music player is doing.
The following functions are available:
_musicplayer.getNowPlaying(): Returns the currently playing track object
_musicplayer.getQueue(): Returns the queued tracks as array of track objects
_musicplayer.getCurrentProgress(): Returns the current playing progress as number from 0 to 1
_musicplayer.getCurrentTime(): Returns the current playing progress as time in seconds
_musicplayer.getBpm(): Returns the current BPM
To control the music player, use the _ui.control() function, see below.
User Input
You can pause your script and ask the user for input by using the asynchronous await _ui.showInputDialog() method. Make sure to use await. This function will return the inputted value as string or null if the popup was closed.
This function takes an object as argument with the follow properties:
{
  input: String // (optional) Type of input, can be "text" or "select". Defaults to "text".
  message: String // (required) Message to show the user
  options: Array[String] // (optional) For input=select only. Options to display to the user.
  default: String // (optional) Default value pre-filled in the input field
  settingsKey: String // (optional) Must correspond to a key in action config.settings. If supplied, this will save user input to that setting. This is the same setting that the user can edit by using the Lexicon GUI.
  type: String // (optional) Type/color of popup. Can be: primary, success, info, warning, error
  confirmLabel: String // (optional) Label of the confirm button
  skipLabel: String // (optional) Label of the skip button
}
👉 See example plugin: ui.inputdialog.text.js & ui.inputdialog.select.js
User Interface
You can report progress to the user by using _ui.progress(0.5). This accepts a number as parameter between 0 and 1. This will be shown as percentage in the plugin loader.
Control
You can control Lexicon and much of what it can do with the control function: _ui.control(). A list of control actions can be found in the Local API reference under Schemas -> Control Actions at the bottom.
File Operations
You can read from and write to files in your plugin's dedicated folder using the _files object. All file operations are restricted to the <PluginPath>/<PluginName>/Files/ directory for security.
To write a file, use _files.write(). This function takes a filename and content string:
_files.write(filename, contents)

filename: String // (required) Name of the file to write. Cannot contain path separators.
contents: String // (required) Content to write to the file. Must be a string.
To read a file, use _files.read(). This function returns the file content as a string:
const content = _files.read(filename)

filename: String // (required) Name of the file to read. Cannot contain path separators.
To list all files in your plugin's folder, use _files.list(). This function returns an array of filenames:
const filenames = _files.list()

// Returns: Array[String] // Array of filenames (not full paths)
Security Notes:
- Filenames cannot contain path separators (
/,\) or parent directory references (..) - All operations are restricted to your plugin's dedicated Files subfolder
- File content must always be provided as strings for write operations
- These operations require the appropriate
files.read,files.write, orfiles.listpermissions in your plugin config